
Part 2 of 2: The Admin Experience
The video demonstration below provides a basic overview of how I created the sensitivity labels and the associated policy that I used during my Part 1 of 2: The End User Experience post. If you are new to this topic it should provide a useful few minutes of content to help you get started.
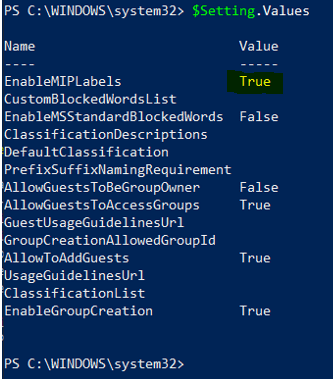
Enabling Sensitivity Labels in a Tenant: At the time of writing I had to enable MIP (Microsoft Information Protection) in my tenant to turn on Sensitivity labels. Some getting started documentations is provided here. I’ve pasted a screenshot of the Group.Unified template with MIP enabled below:
In a production environment there are numerous other considerations we need to incorporate into a deployment plan. For example, if a tenant has previously used Classic Azure AD group classification, then you’ll probably want to migrate these labels to your new ones. For more detailed information about this topic and others start here.
